
an online portal for guitarmakers, guitar enthusiasts, and students
following Natelson & Cumpiano's treatise, GUITARMAKING: Tradition & Technology

Alan Chapman's marquetry-rosette-making technique
Page 2
3- The glued-up log is now sawed crosswise into numerous 'tiles'.
Individual "tiles" must now be sawn off the end of the log, like slices off a salami. The sawn 'tiles' must be then be reserved for the subsequent inlay process.
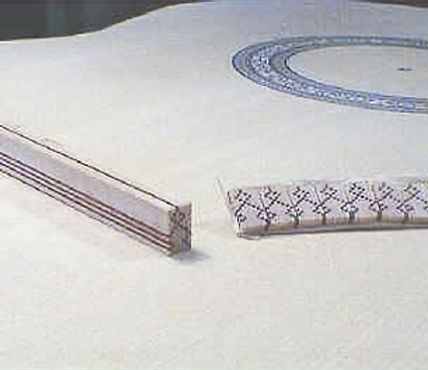
A fine-tooth slitting saw blade is ideal for this purpose, although your garden-variety plywood blade will work--although it will gobble up a lot of valuable stock. A table-saw "throat" is inserted to keep the tiny tiles from falling into the saw. A spring clamp fixing a stop block to an extension on the cross-cutting fence, is adjusted until the precise tile thickness--about two-thirds the thickness of the top--is reached.

Proceed to slice off the tiles one at a time. A log usually yields enough tiles for one rosette.

We accumulate the tiles in the adjacent fence slot in the table so they won't scatter and get lost. Each tile must be henceforth examined for flaws: missing bits, and insufficient or uneven thickness

The tiles are now ready for inlaying. A drill-press fly-cutter is the ideal tool for this next process.

4- The tiles are inlaid into a circular slot in the soundboard to complete the rosette
A drill press fly-cutter is pretty much indispensible to the job. The two most common are the General at the left (Alan has improvised a second cutter on his), and my Sears Craftsman on the right, which is sturdier. Some of the flat-bottomed bits that come with the units are useful, but we've had to improvise by fashioning custom bits (thin slotting bits, tapered cut-off bits) which expand the units'capabilites

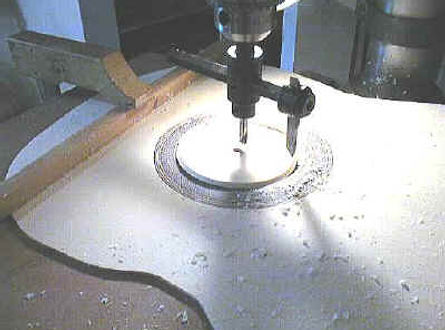
The soundboard is slotted for the marquetry tiles, to the diameter and width called for on our original layout drawing.

The sliding fly cutter arm allows us to widen the slot minutely until a test tile fits in snugly and comfortably

The tiles are inserted with a thin skin of glue applied to the bottom of the slot about a quadrant at a time. A small piece of softwood scrap is used to push each tile firmly against it's mate.
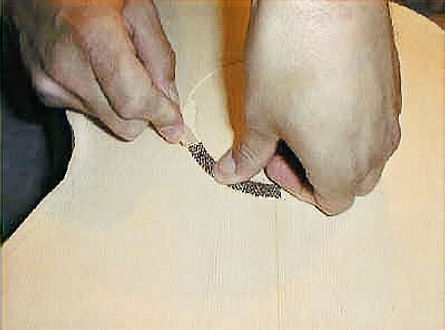
This is done until the entire ring is filled with tiles. Alan's work was so precise that the last tile fit precisely into the final space allotted for it.

Let the ring dry for a couple of hours. After the marquetry ring is THOROUGHLY dry, scrape the ring flush with a finely and recently sharpened scraper blade. Otherwise, you can bully particles of the rosette out of the slot. Scrape in an oblique, shearing motion.
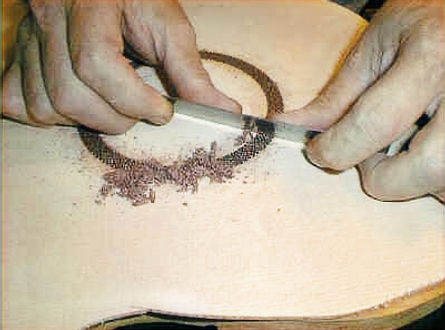
The soundboard is returned to the drill press and two new slots are drilled adjacent to the marquetry ring. This imparts to the the top and bottom edges their proper curvature, since if you recall, the tops and bottoms of the logs were originally flat and straight.

Alan makes up the outer and inner rings ahead of time, from glued-together veneer sheets that are wrapped around a circular form and then sliced into rings.
Another option is to simply insert individual veneer lines directly into the circular slots adjacent to the marquetry ring.

If pre-made veneer rings are used, there is usually a gap at the top at their ends, which Alan fills with more curved veneer ring material

After the glue dries, the veneer rings are scraped flush with the marquetry ring and the top.
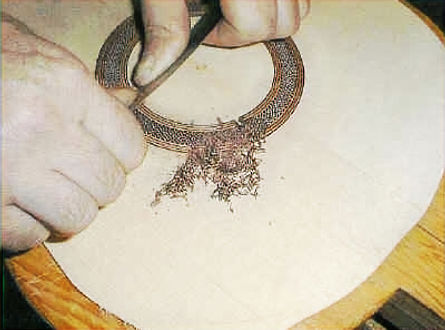
Finally the top is returned to the drill press and fly cutter, which now has a tapered cutoff bit. The sound hole is cut out, finishing the project.
Alan Chapman's rosettes are made of 100% natural, undyed woods, and are among the finest and most beautiful in the industry.
